

前置条件
开始之前,请确保您拥有以下内容:- 一个 LangSmith 账户:在 smith.langchain.com 注册(免费)或登录。
- 一个 LangSmith API 密钥:遵循 创建 API 密钥 指南。
- 如果您不希望数据被 追踪 到 LangSmith,请在应用程序的
.env文件中设置LANGSMITH_TRACING=false。禁用追踪后,没有数据会离开您的本地服务器。
设置本地 Agent 服务器
1. 安装 LangGraph CLI
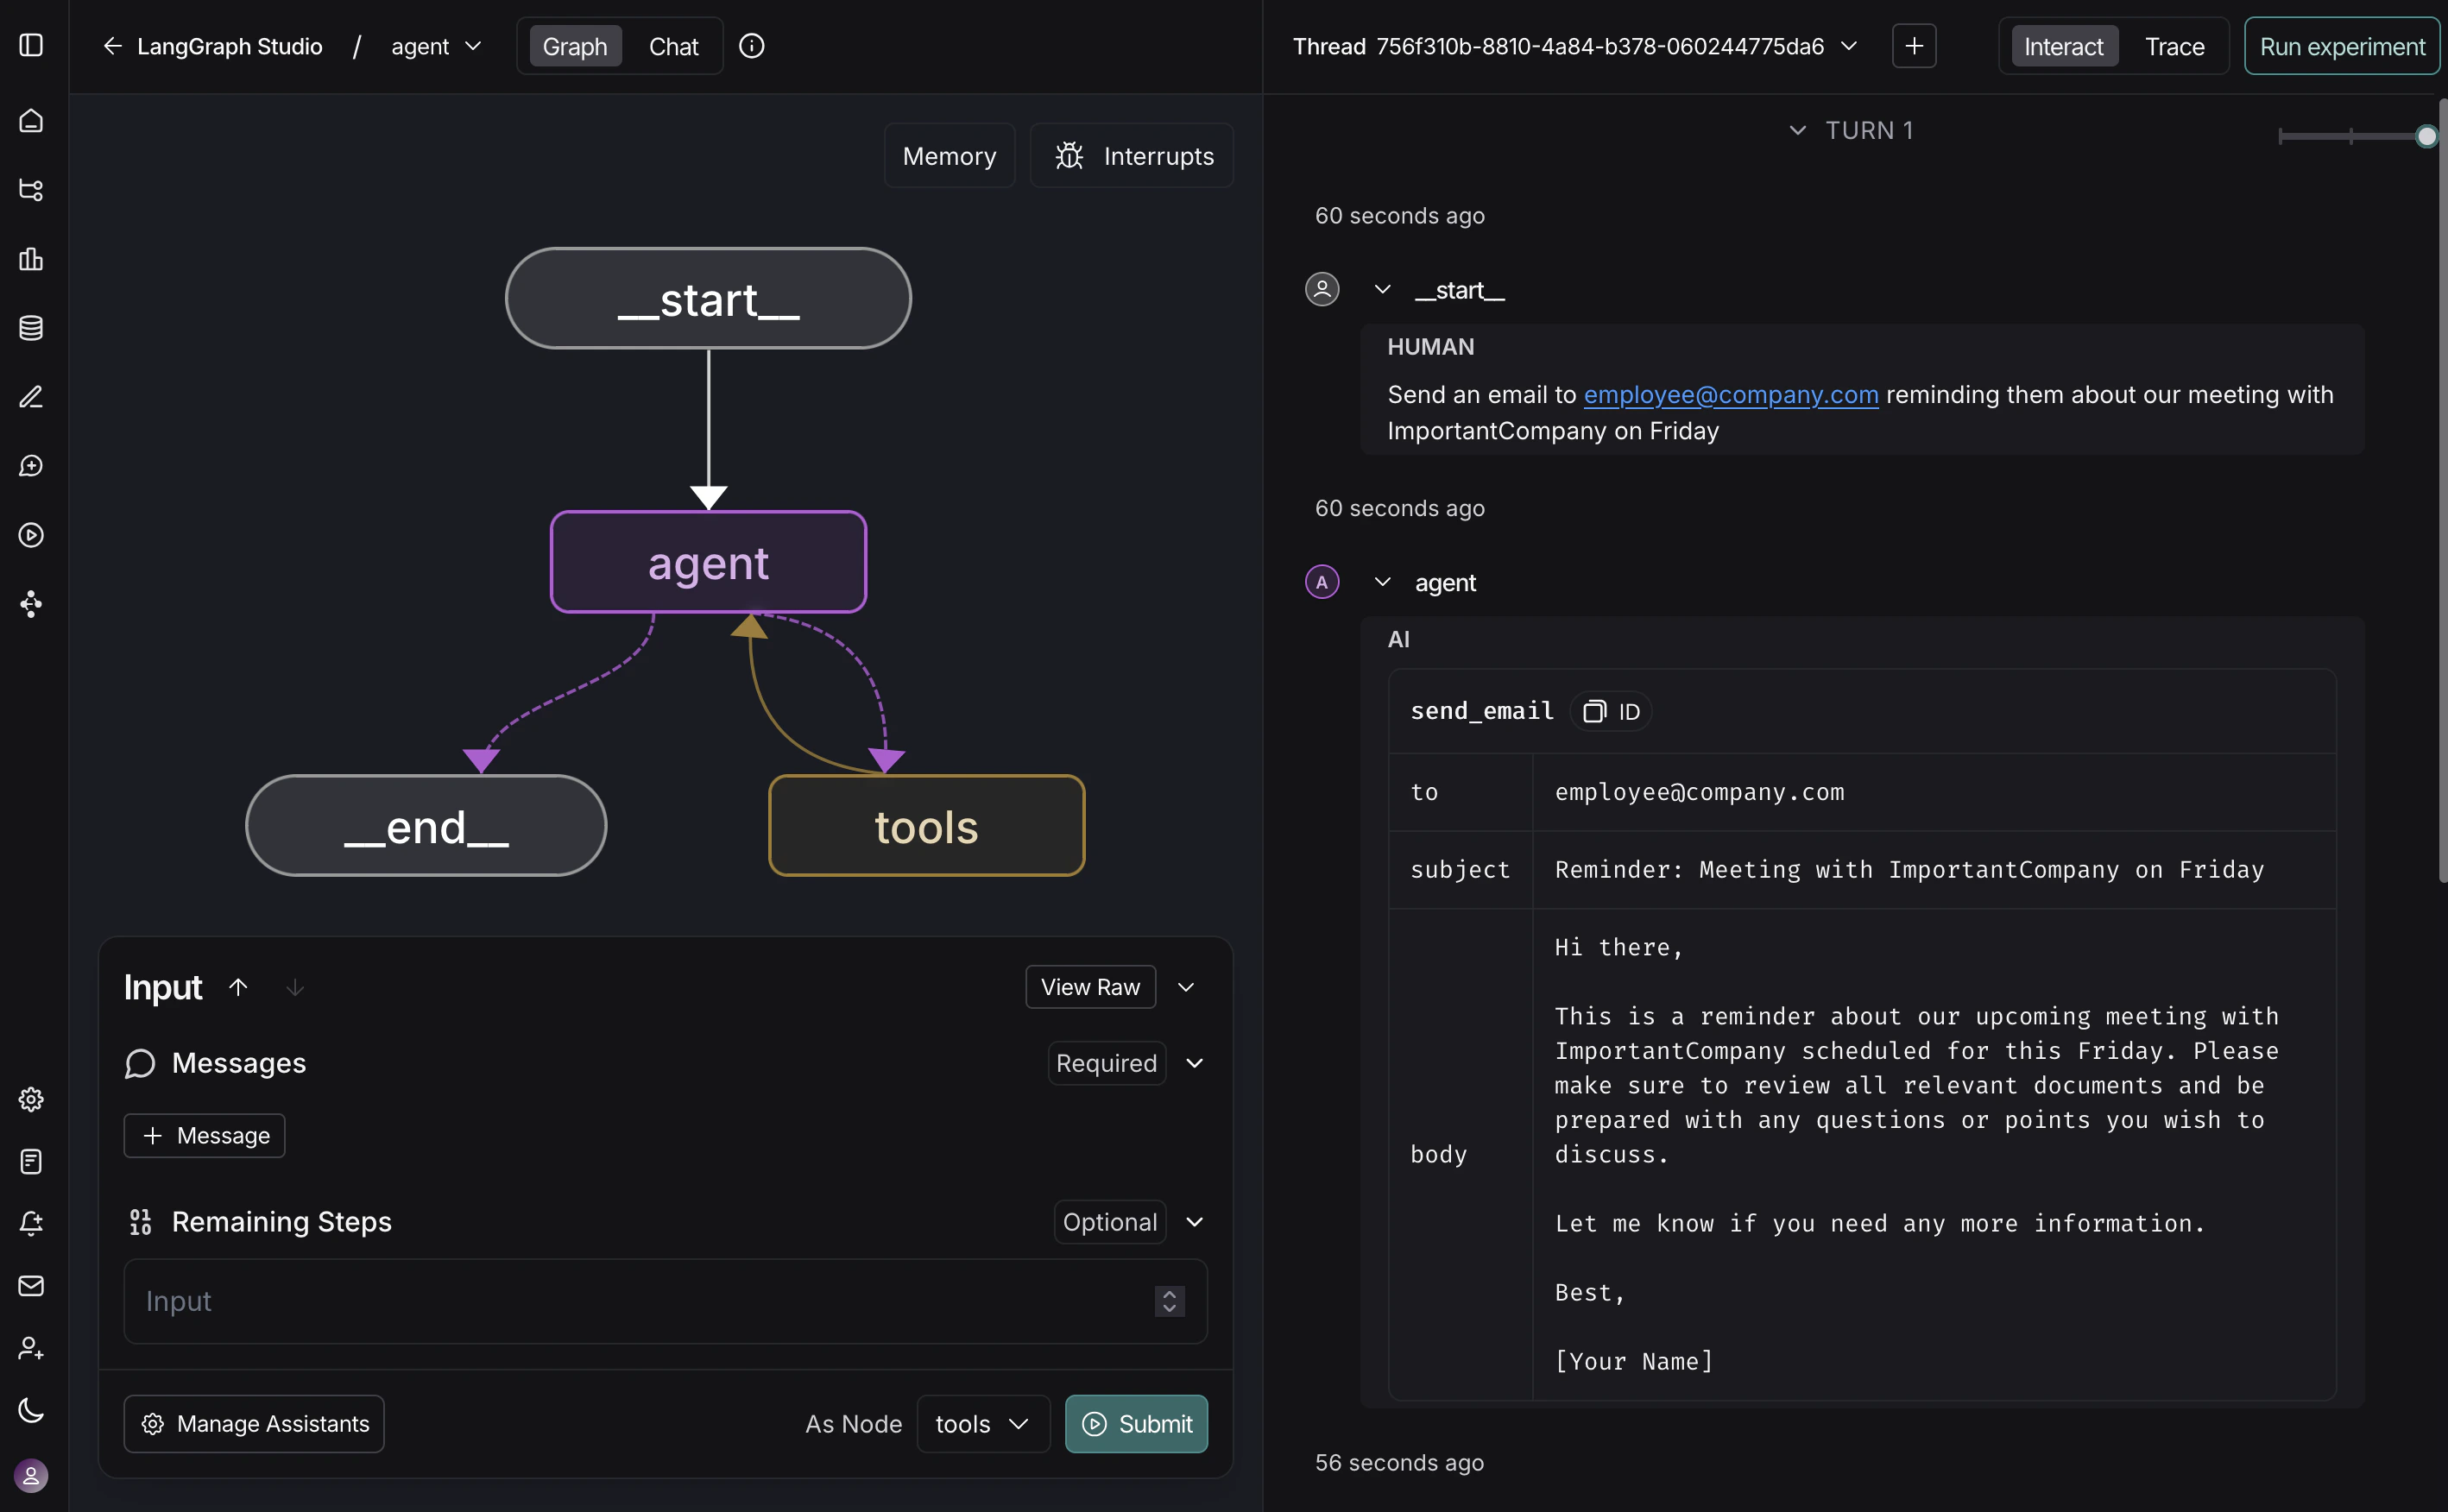
LangGraph CLI 提供了一个本地开发服务器(也称为 Agent Server),它将您的智能体连接到 Studio。2. 准备您的智能体
如果您已经有 LangChain 智能体,可以直接使用它。此示例使用一个简单的邮件智能体:agent.py
3. 环境变量
Studio 需要 LangSmith API 密钥来连接您的本地智能体。在项目的根目录创建一个.env 文件,并从 LangSmith 添加您的 API 密钥。
.env
4. 创建 LangGraph 配置文件
LangGraph CLI 使用配置文件来定位您的智能体并管理依赖项。在应用的目录中创建一个langgraph.json 文件:
langgraph.json
create_agent function automatically returns a compiled LangGraph graph, which is what the graphs key expects in the configuration file.
For detailed explanations of each key in the JSON object of the configuration file, refer to the LangGraph configuration file reference.
5. 安装依赖项
从根目录安装您的项目依赖项:6. 在 Studio 中查看您的智能体
启动开发服务器以将您的智能体连接到 Studio:http://127.0.0.1:2024 and through the Studio UI at https://smith.langchain.com/studio/?baseUrl=http://127.0.0.1:2024:
视频指南
Connect these docs to Claude, VSCode, and more via MCP for real-time answers.